We recommend setting up a development cycle for each element you work on and using this to keep all the relevant information together, as a log of your work. These pages are private to you for your own development.
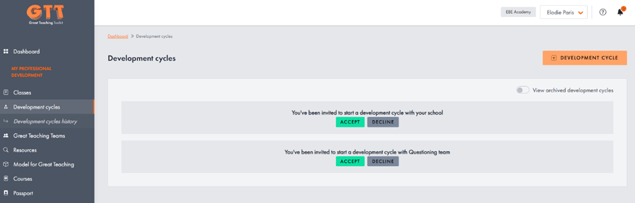
Click on your Development cycles page to get started. There are two ways to set up a development cycle: as an individual or you can be invited to join one by someone you work with, such as your Coordinator.
Creating a development cycle if you’re working on your own
If you are working as an individual, you can create a new development cycle by clicking on the “+ DEVELOPMENT CYCLE” button. Add a title for the cycle (e.g., Hannah’s Explaining development cycle) and select the element or dimension you want to work on using the dropdown menu. Click “Save” and the development cycle you have just created will appear on the main screen.
Creating a development cycle if you’re working in a team
If you are working on an element of Great Teaching as part of a team, or if your whole school or college is working on the same goal together, you will also find invitations to start development cycles for these elements on this main page (as in the example below). Click “ACCEPT” to join a cycle. If you click “DECLINE”, the invitation will disappear.
Your development cycle
Click the “START” button - this will take you through the workspace for that development cycle. This is a private area for you to record your development goals, decisions and actions as you work on this element. The workspace helps you keep all your PD work together – no more bits of paper, or random emails to dig out!
In the workspace, you will find five sections:
- Goals
- Strategies
- Actions
- Resources
- Timeline
The information button (shown below) tells you what each section does. Click on each one to find out!
In each section, you can add information using the orange “+” button. Here’s a quick explanation of what each section is for and how they work.
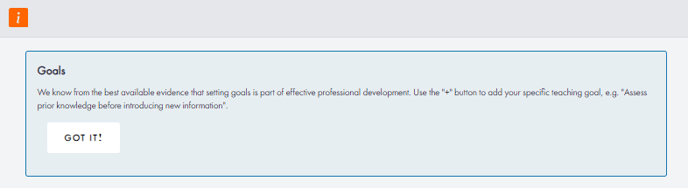
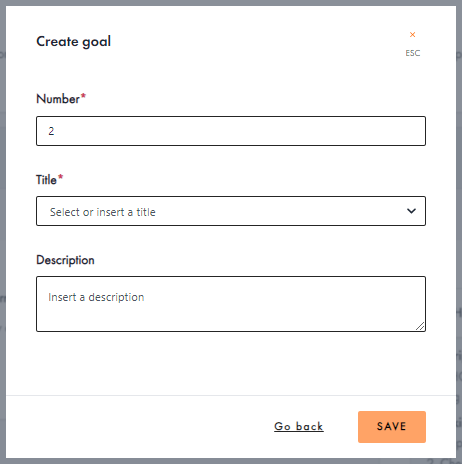
GoalsWe know from the best available evidence that setting clear and specific goals can help you improve your practice. Using the orange “+” button, add:
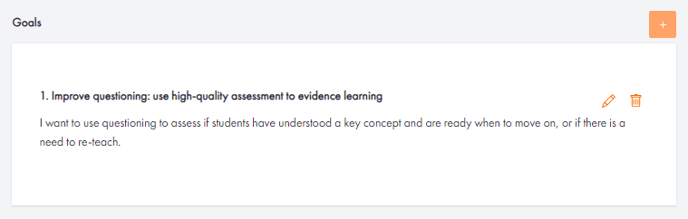
- A number – you might have more than 1 goal;
- Title – You can write this yourself or, if you specified when you set up the development cycle, which element you will work on, select one a pre-populated from the dropdown menu;
- A brief description of your goal(s) for this development cycle - as in the example e.g., why have you chosen this? Why is it important in your context?
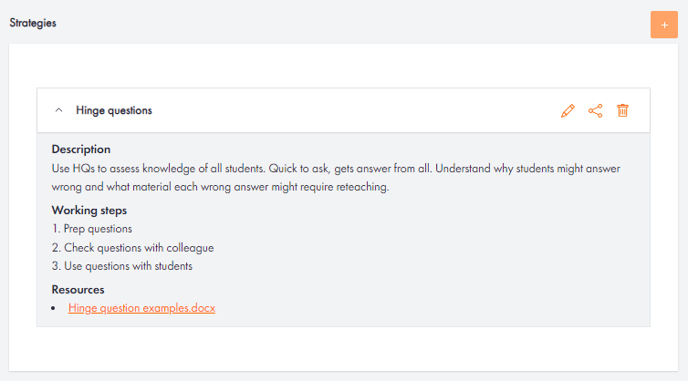
In this section, click the orange “+” button and add the name of the strategy you will use to help you achieve your goal (e.g., Cold calling). Enter a brief description of the strategy (e.g., Ask a question, wait for 10 seconds to allow for thinking, then call on a named student to answer).
Break down your strategy into actionable steps and add these in the Working steps section. Doing this now will help you remember and stick to your plans later.
Finally, add any resources that you want to keep with your strategy. This could be a blog post, a video of the strategy being used well, or anything you like! Keeping everything in one place will make it easy for you to refer back to! Hit the “+ADD URL” button or drag and drop a file to collate resources for your strategy. Once you are ready, click the “ADD STRATEGY” button.
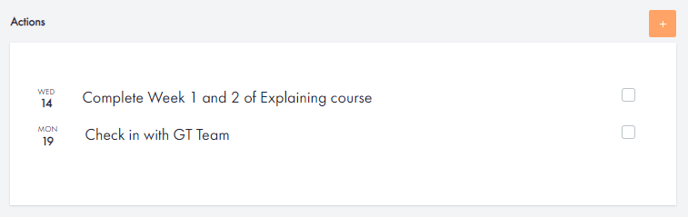
Great Teachers achieve their goals by planning actions and doing them. This section will make it easy for you to do just that! For example, if you are working on Element 4.3: Questioning , you might choose to read the relevant section on your Model for Great Teaching page. Or you might create an action to set a student survey for a class to gain insights on your practice. When you mark actions as complete, using the checkbox, these will appear in your timeline. Any actions assigned to you during meetings (using the meeting templates) will also appear in this area.
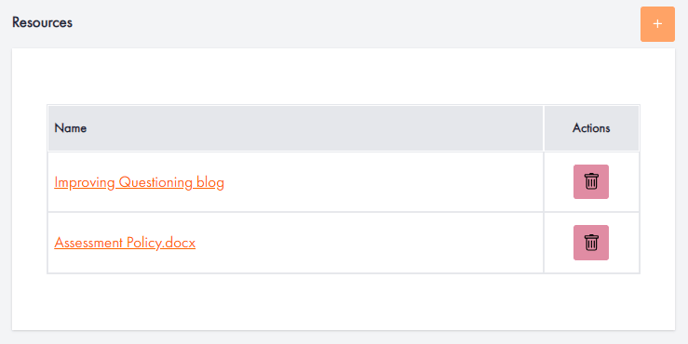
In this section, you can record resources useful for this development cycle. You may upload documents (e.g., departmental resources or schemes or work, policy documents) or link to useful websites.
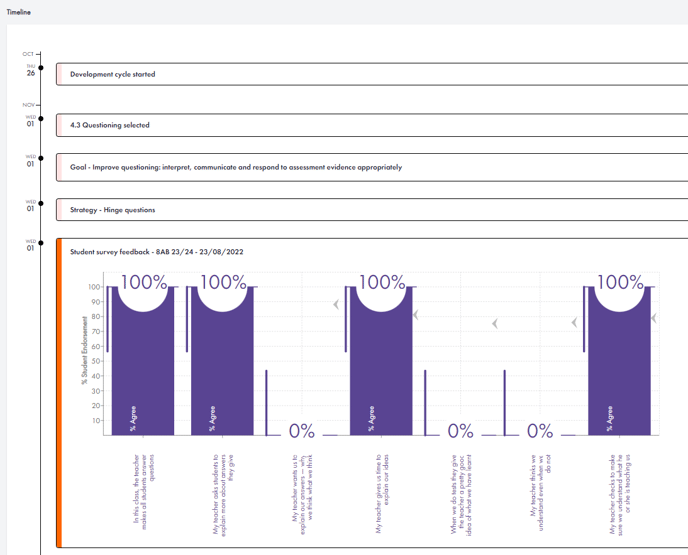
The Timeline is your running record of everything you do in your Development cycle. Everything is recorded automatically, so keep checking it and making it look beautiful by updating your Goals, Strategies, Actions and Resources sections regularly!