
If you haven't yet created your GT Team, your GTT Coordinator can do this. Click here to find out how to do so.
The Great Teaching Teams page includes two areas:
- The meetings overview page – where you can set up meetings and assign agendas; and
- Team workspaces – shared spaces to record discussion notes from each meeting.
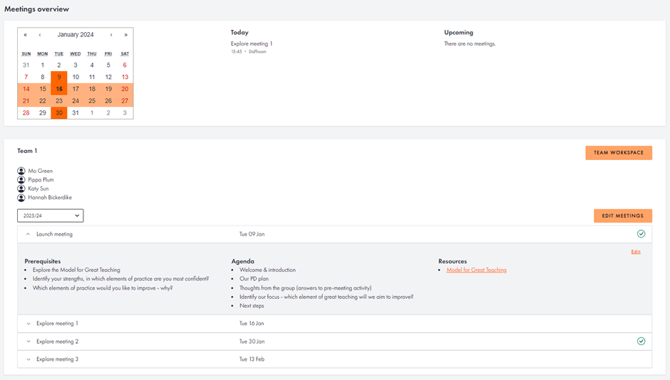
Meetings overview
Once you are in a team, it will appear on your Great Teaching Teams page. This page is the space to schedule meetings and detail what will be discussed in each.
Add meetings to your Team’s calendar by clicking on the “CREATE MEETINGS” button – you can add multiple meetings at once using this pop-up. The meetings will appear in the calendar of all team members’ accounts – ensuring everyone in the team has a clear record of their CPD commitments.
To add an agenda to a meeting, click on the meeting’s name and then on the “ADD AGENDA” button that will appear.
In the popup, you can input the prerequisites and agenda items of the meeting.
To help you structure these meetings, we have created meeting templates for the six stages of the development cycle:
• Identify an element of Great Teaching
• Explore* an element of Great Teaching
• Focus on developing your practice
• Prepare your development cycle
• Integrate your chosen improvement strategy
• Review your development cycle
*An Explore meeting template is available for each course, aligned to the reflection tasks in that course e.g., Explore Explaining, Explore Creating a supportive environment.
Simply select the relevant meeting template in the dropdown menu and the prerequisites (e.g., information colleagues need to read before the meeting), agenda items and resources will be populated for you. You can edit these if you wish then click “CONFIRM”. If you wish to create your own meeting from scratch, you can input your own responses into the fields of the popup.
Use the pop-up to record any pre-requisites to the meeting, agenda items and any resources needed. This information will then be viewable by your team members in their accounts.
Team workspace
This is a shared area where team members can record notes from their meetings – all team members can see information added to this area. We recommend for each meeting one person acts as scribe and that you rotate who this person is between meetings. To get started, click the green “START MEETING” button, then type your notes into the meeting pro forma. You can add files (e.g. policy documents) and upload feedback from the student surveys and video observation tool (if you choose to). You can also set actions for colleagues to work on between now and the next meeting.
To save your notes, click the red “FINISH MEETING” button. You must do this to save your notes but you can edit notes later by clicking the orange pencil icon. Once saved, notes will appear in all team members’ accounts.
Note – only one colleague can edit a meeting at a time. If you find you are unable to edit a meeting’s notes, it is likely one of the members of your group already has the meeting open and they will need to close this before you can proceed.